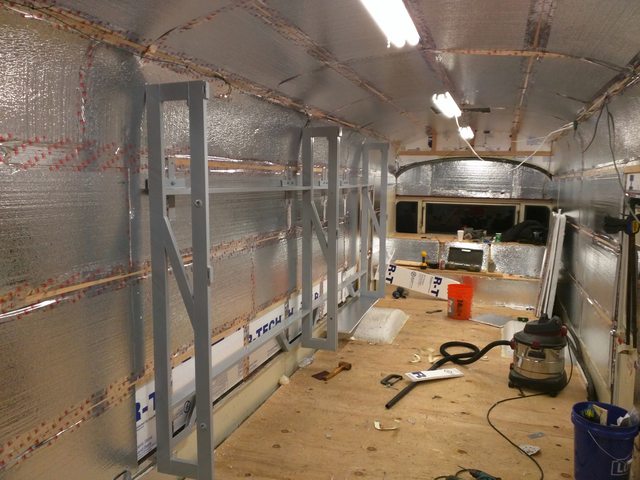
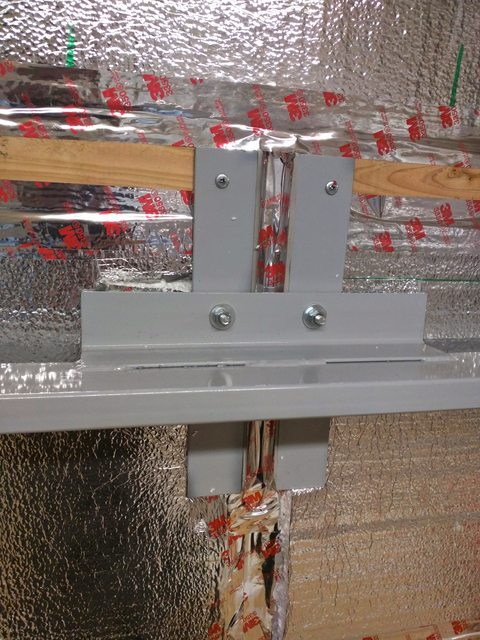
Got the bunk frames sanded, painted, holes drilled, and installed. The real story that you don’t see all the parts to is the mounting on the bus itself. I had to take apart the insulation and install the brackets with UHMW plastic bushings to keep as much of the thermal break intact as I could.
The pivoting bed frames are sanded and primed, I just need to paint them and install now.
Next I’ll build the pivoting frame for the master bedroom, and probably start on some partition walls.
The paint turned out surprisingly nice, considering what I used. I think I’ll use this paint setup for all the interior metal components and frames.
Primer:
Rustoleum etching green primer on lightly scuffed clean and dry steel (no previous paint)
Super cheap “euro gray” (hello, IKEA!) finish:
1 quart rustoleum gloss white
1 quart rustoleum gloss gray
1 quart virgin lacquer thinner
Mix with a paint stirring stick in a gallon can
Use a touch up spray gun, like a cheap one from Harbor Freight.
Set to a fan that’s just wide enough to shoot the parts. Air pressure about 80 psi.
I was spraying in absolutely horrible conditions: near 100 % humidity, and cold, probably 60 F or less.
Turn up heat and let it dry for 24 hours.
The finish turned out as good as factory purchased furniture frames.
One thing that’s neat about those little touch up guns like that is they don’t let the VOC escape, so you can do tricks like fill it full of slightly reduced contact cement for assembling panels and other things that need gluing.
It’ll sit around forever (days) and not dry out. Obviously, that won’t work with a catalyzed material.