I live near Boeing, land of riveted aircraft. I think nowdays it’s mostly robots doing the riveting, but anywhoo, I needed to figure out how to rivet bus skins. Here’s a collection of things I learned when riveting the panels.
First, get a 4x rivet gun.
You’ll realize that not only can you use it to drive rivets into all sorts of new projects you didn’t think about earlier, but it’s fantastic for plenishing out dents and damage in body work as well.
For example, I used it to fix the severely creased bay door on the right side of the bus. In about a half hour with the plenishing hammer attachment on it I was able to hammer everything back into shape, and needed only a very thin skim of body filler to even out some scratches and gouges in the sheet metal.
It’s a great tool.
You’ll need a lot of rivets.
I used about ~1400 rivets in total, most of them were the smaller 3/8″? I think… I’ll have to check later. Anyway, they were basically the same size as the rivets that bluebird used on the roof to rib attachments.
I also picked up a couple hundred monster 1/4″ rivets to re-attach the rub rail. Those got a little painful to install after a while.
Have a Bucking Buddy.
Make sure you have a good bucking friend, you’ll get the process down quick “ready ready go” or the bucker pushing on the rivet tail to indicate ready. I think after about the first 50 we were good. My bucking buddy went to school and was applying to work at Boeing, where they drive a lot of rivets.
Hang the metal right.
Get a million clecos. The gold ones, 3/8″. You should be able to fit a panel or two at a time with them. Drill and install. It’s like spreading a bedsheet flat on a mattress.
I didn’t bother with heating of the metal at all. There are some oil can tendencies in the metal, but I don’t really care. Once the insulation was installed to hold things in place nothing moves.
I believe picking a fastening pattern is more important than any heating or pre-treatment that you’re going to do.
For me, I treated the metal as if I was attempting to hang stiff fabric or paper onto a frame. I attached temporarily in the middle of the sheet first, then down, then out alternating left and right side.
Use a barrier agent on the seams.
All the sheet metal to the ribs with an insulating layer of acrylic tape. This does a couple things:
- I could literally “peel and stick” a 4×10 sheet of 20 gauge sheet steel to the side of the bus.
- Do not underestimate the power of acrylic tape adhesive.
- It provides a thermal break between the skin and the ribs.
- It significantly reduces abrasion of the protective paint coating on the metal between rib and sheet, since I elected to not use galvanized sheet.
- It keeps moisture out, since the tape body consists of a closed cell foam material.
- It is “squishy”, and absorbs vibration and noise. Also, note the callout after this list.
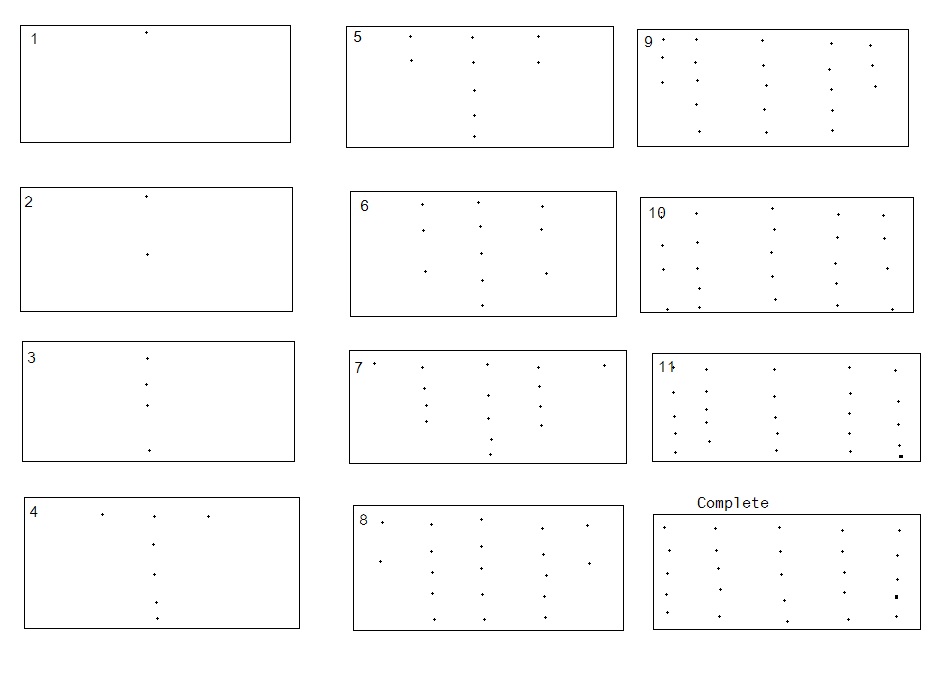
Shrink the sheet as you fasten it.
This is important, and is based on prior experience I have making this sort of stuff. Every rivet “dimple” that occurred when driving over the top of the tape strip causes a small amount of shrinkage of the sheet metal.
By using the pattern below – I call it “drip and skip” – you drip down, but skip ahead one rivet then drive between, it causes the sheet metal to shrink and pull together with every driven rivet.
If you’re brave, you could try a shrinking disc on the bubbled panels if you have them and they’re noticeable enough. I’m not brave enough to do that, nor did I need to.
“Drip and skip” (TM) (hahah)
Aaron, I am suprised nobody responded to your efforts. Nice post.
Many years ago I learned basics on how to rivet with aluminum, which is much softer probably easier to work with. I wondered about the flow pattern on the sheet metal. I appreciate your insights and recommendations.
I am picking up a 2007 Thomas next week in Las Vegas with my wife. We are looking forward to converting it to our home. Your many articles and youtubes are partly responsible for us decided to do a Skoolie with a roof raise.
I am leaning towards the steel pull rivets on steel panels, since the noisy bucking technique is not neighbor friendly 🙂
Thank you for all you put out there for those of us who are seaching for useful information. You are a great resource.
We are looking forward to getting started.
Thanks for the feedback, it means a lot. Good luck on your conversion, if you have any questions feel free to reach out.
Do u remember who u ordered ur rivets thru? And was 3/8 the full measurement,head size,or tail length?